How to create an NFT Index Fund
One of the advantages of using the NFTX platform is the permissionless way in which anyone can create a fund. Below are the steps that you need to go through to create one yourself (although please note that Sushi is currently having issues listing the tokens which should be resolved shortly)
Choosing your NFT collection
The first thing to realise is that support for every different NFT is not avaialble. It needs to be based on Ethereum, and it needs to be one of the following contract types:
- ERC721
- ERC20
- ERC1155 (support just added)
Once you have confirmed that you are trying to create a fund for a supported NFT type then you can move onto the next step.
It is also worth noting that you'll want to have at least one of these NFT's in your possession so you can starting filling your fund/vault
Creating the NFT Vault
The next thing to do is head over to https://nftx.org/#/backend
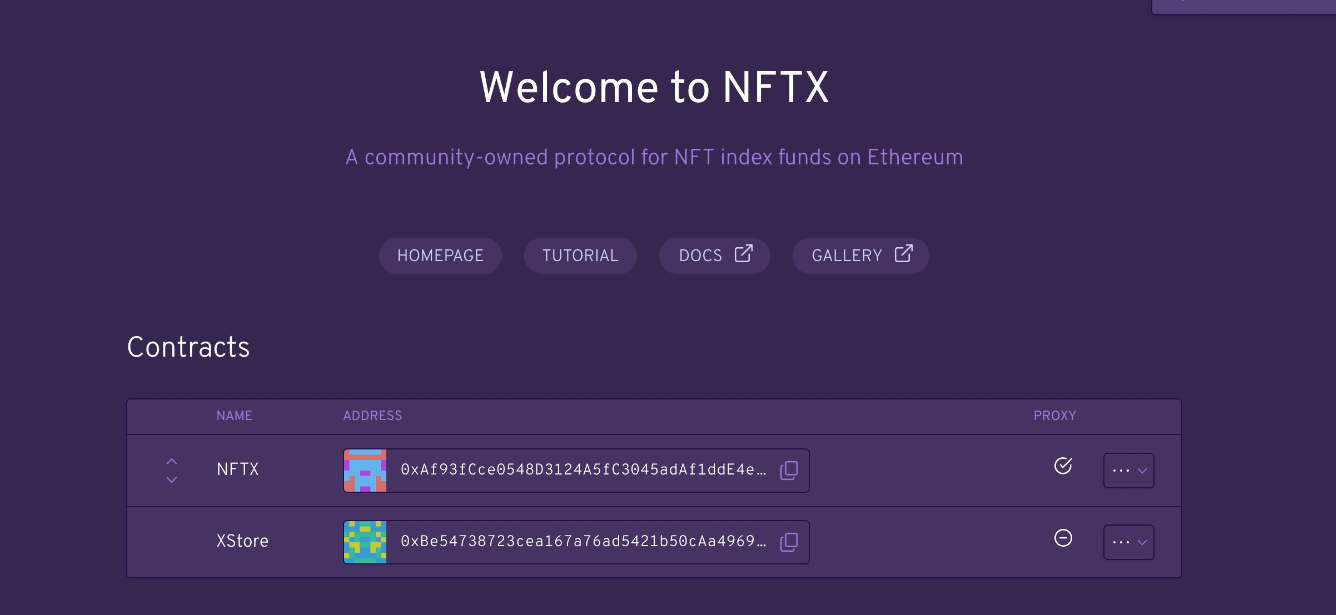
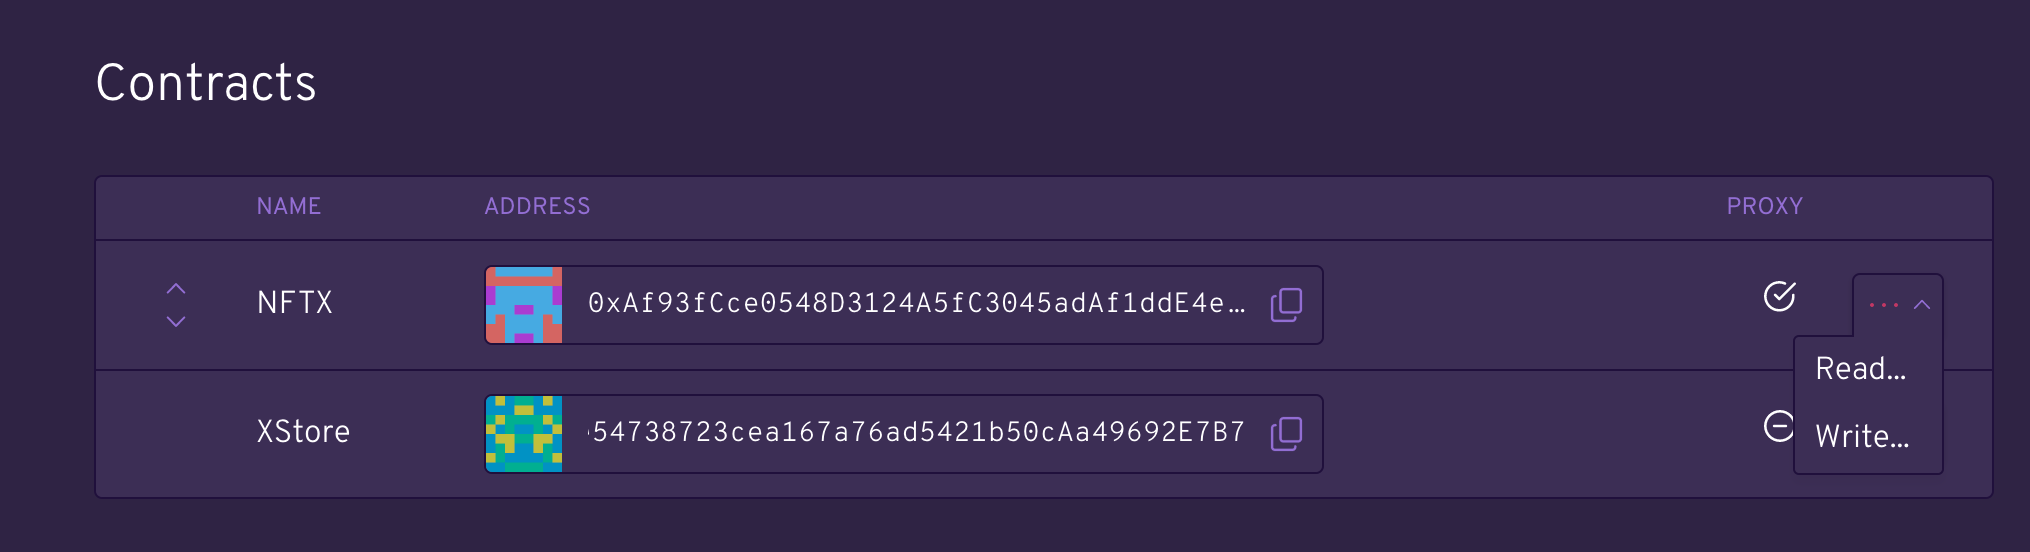
From here you will want to connect your account using MetaMask. You will notice that there are two contracts, NFTX and XStore, we will be primarily using NFTX for this tutorial.
Choose the Write action from the dropdown agaisnst the NFTX Contact
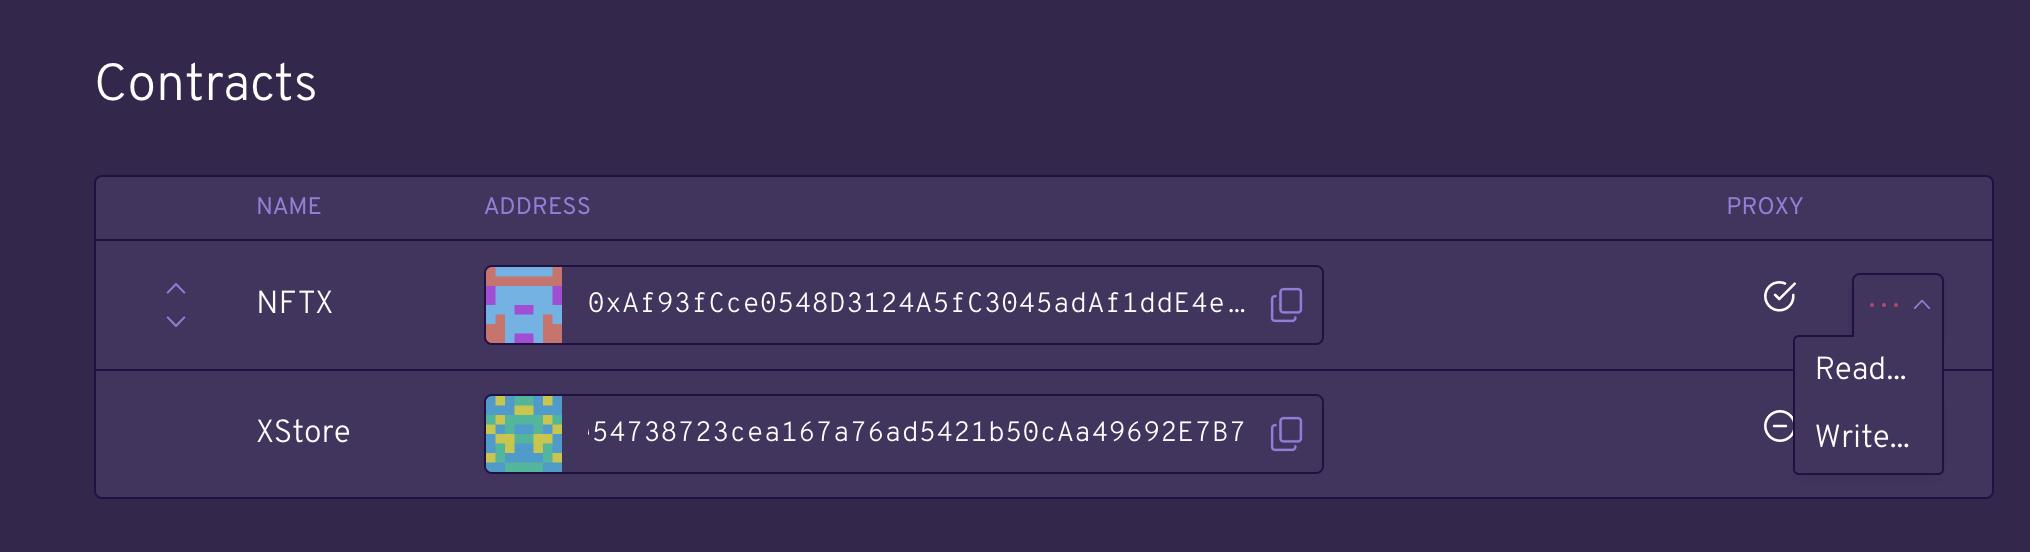
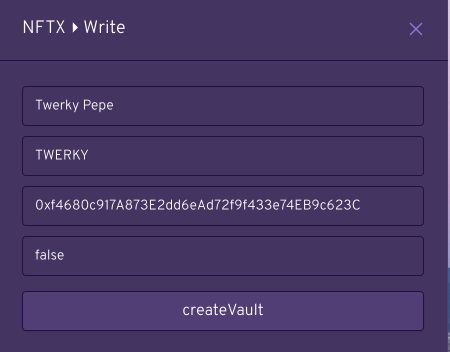
Scroll down the list until you see the CreateVault function where you need to include
- Name of the fund
Twerky Pepe - Token Name
TWERKY(try keep this to one word, no dashes, and 7 characters if you can help it) - Contract Address
0xf4680c917A873E2dd6eAd72f9f433e74EB9c623C - D2Vault (should be set to
false)
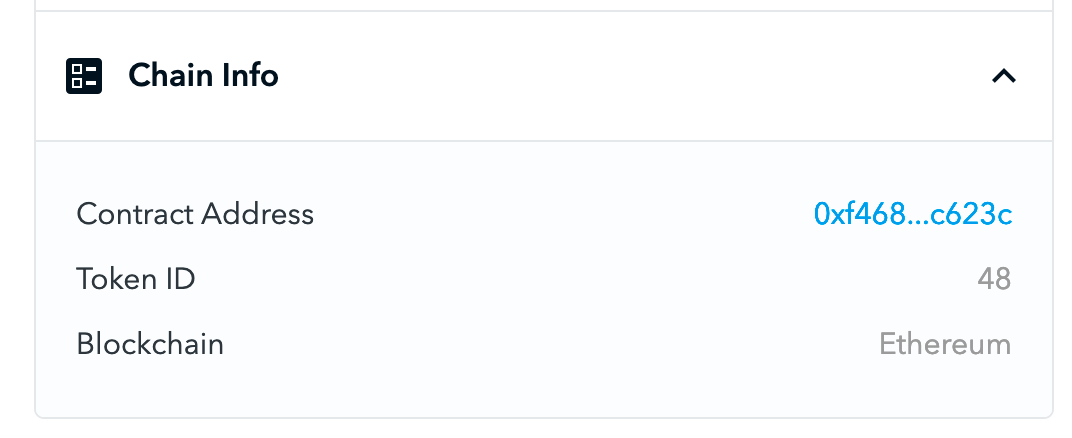
If you are unsure what the contract address is for your NFT you can find it in the Chain Info on your NFT Opensea page ( you can also get the Token ID from here too). Clicking on the link will take you to Etherscan where you can copy the address. Keep that Etherscan page open, you'll need it soon.
Once you've got those details, you click createVault and it will do what it says on the tin. At this point you will get a prompt from MetaMask to pay Gas for the transaction
Once you get confirmation that the process is completed you will need to move to the next stage.
Finding the vaultID
Every fund that is create will get its own vaultID which you need to complete the process of setting up the vault. In the future, these steps will be taken care for you through the front end but for now you need to do a few more steps.
You should still be on the https://nftx.org/#/backend, but this time we need to interact with the XStore contract.
Copy the XStore contract address, 0xBe54738723cea167a76ad5421b50cAa49692E7B7 and head over to Etherscan.
Paste in the contract address and go down to Contracts -> Read Contract.
Alternatively here's a link https://etherscan.io/address/0xBe54738723cea167a76ad5421b50cAa49692E7B7#readContract
Scroll to the bottom until you come across vaultsLength which will show how many funds have been created. The image below shows 32 vaults, but because the vaultID's start at 0 the latest vault created will be number 31.

For our purposes, our vaultID was number 29 when we created the TWERKY fund.
Now that we have the vaultID we need to confirm which type of fund this is and finalise, but before we do let's just double check that we've got the right id.
While still in the XStore Contract, move down two fundtions to number 33 xTokenAddress and add the vaultID (in this case, 29)
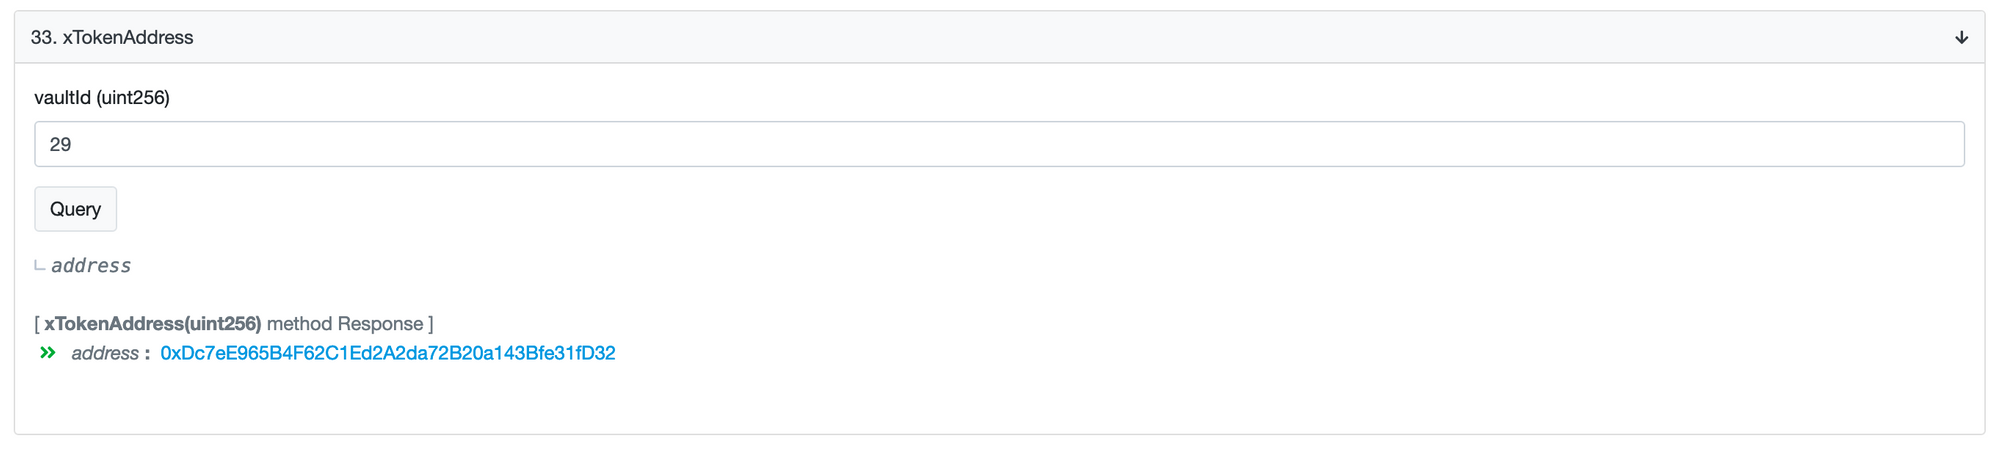
This provides us with the address for the token as a link to that contract on Etherscan. Click on that link and you will be able to see what that Token adderess is called.
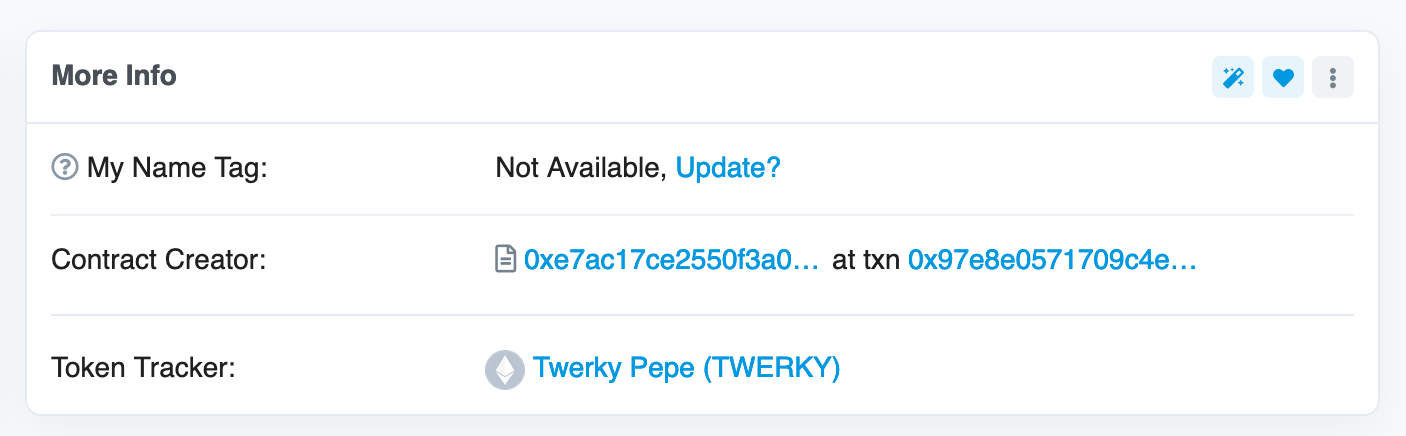
As you can see, the Token Tracker contains the name and the token for the fund I just created. If this doesn't match your fund, someone might have created a new fund just after you, so try another vault ID earlier.
Setting vault to ERC1155
This step is only required if you are creating an ERC1155 fund, otherwise skip along to Finalising the vault.
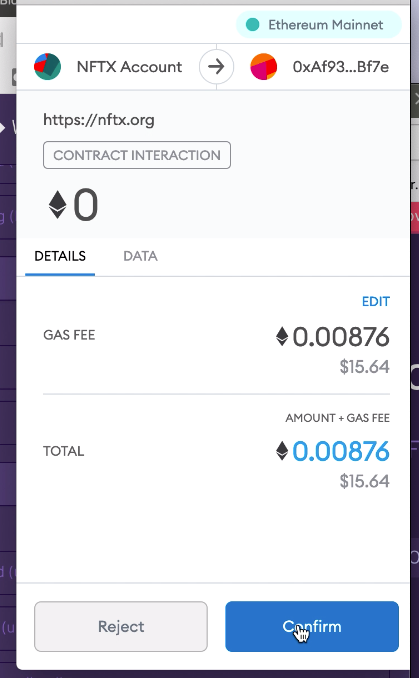
Return to the https://nftx.org/#/backend and choose the NFTX Write function again, except this time instead of creating a vault we want to use setIs1155, passing the vaultID as 29 (which was the TWERKY VaultID) and the value of true as the second argument.
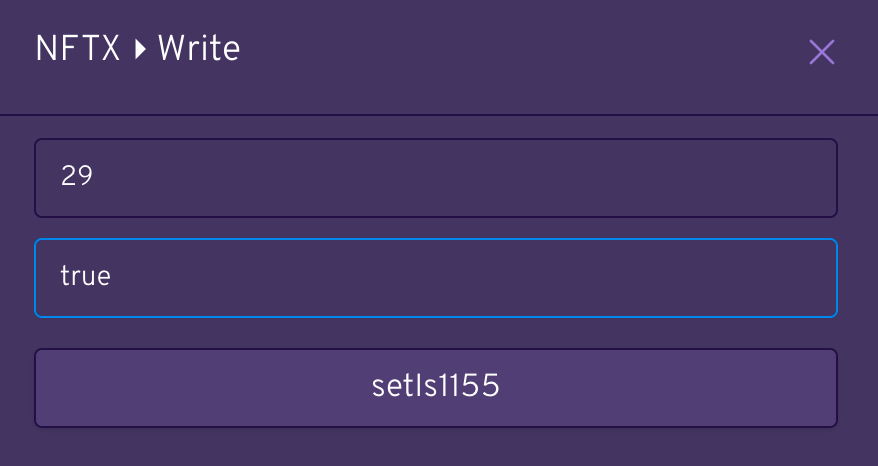
This will require a bit more Gas.... doesn't everything
Once that has been completed, it's time to finalise your vault.
Finalising the Vault
We've almost finished.
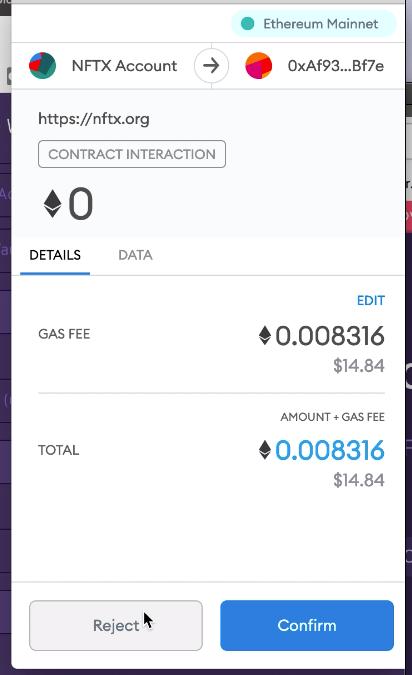
Head back to https://nftx.org/#/backend and into the NFTX -> Write option again, and this time find the finalizeVault function and add the vaultID you confirmed a couple steps back (in this case, 29)
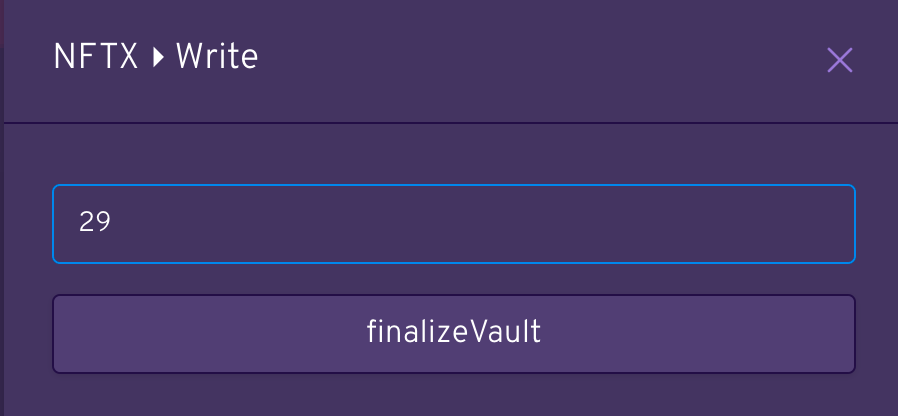
This is the final transaction for creating the Vault.
Congratulations, now you've created your first vault.
Things to note
- Once you create your vault you will not appear on the list of available funds on the NFTX.org site. While it is permissionless to create funds, we don't want just any fund to be listed on the homepage without first confiring that it is not a scam. You can still send people to your fund by providing them with a link, https://nftx.org/#/fund/
vaultID, or in this case https://nftx.org/#/fund/29 - Minting isn't immediately possible until you do a few more steps... see the insturctions below
- You will not automatically be displayed on the https://gallery.nftx.org site. This again is a result of not wanting scam funds to appear more legitimate, and also because there are some image and content requirements for the fund displays. If you would like to be added to the Gallery please complete this form https://docs.google.com/forms/d/e/1FAIpQLScnaUGFuz6-iyLTCeLhcLcFfxAdpPhGzGfxDtET7qgBIJO_xg/viewform and we'll get you sorted.
Allowing Minting
If you thought it was over.... almost. Just a few more steps to go.
Now that the fund has been created we need to give permissions to be able to mint NFT's into that fund.
Remember earlier when I said to leave the Etherscan NFT Contract Address page open because we'll need it later? Well we need it now :). As a reminder, the contract address for the NFT collection (not your fund) can be found listed in the Chain Info on an Opensea page,

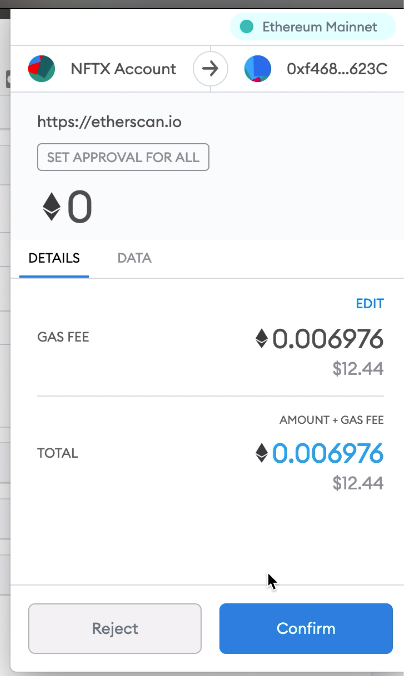
Now that you've got that link, we want to go to the link, i.e https://etherscan.io/address/0xf4680c917a873e2dd6ead72f9f433e74eb9c623c, then to Contract and Write Contract. At this point what we're doing is we are allowing the NFTX Proxy contract to mint any NFTs from this particular contract.
If you've forgotten where you
- _operator: the NFTX contract address
0xAf93fCce0548D3124A5fC3045adAf1ddE4e8Bf7e - _approved:
true
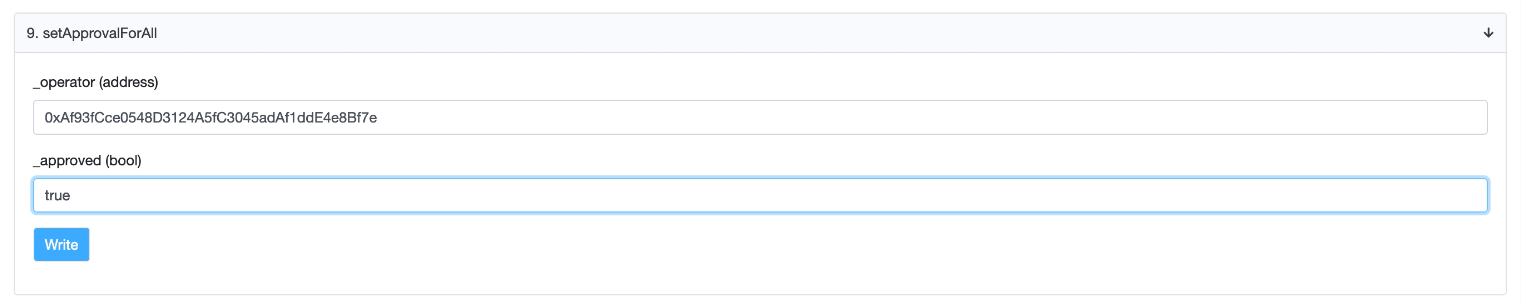
Writing, of course, requires a bit more Gas
Minting to your new fund
Now that you have set up your new NFT Index Fund and alloed Minting, you can now Mint your NFT into the fund.
This can be done from the frontend once the fund has been approved, but you can get started directly on Etherscan.
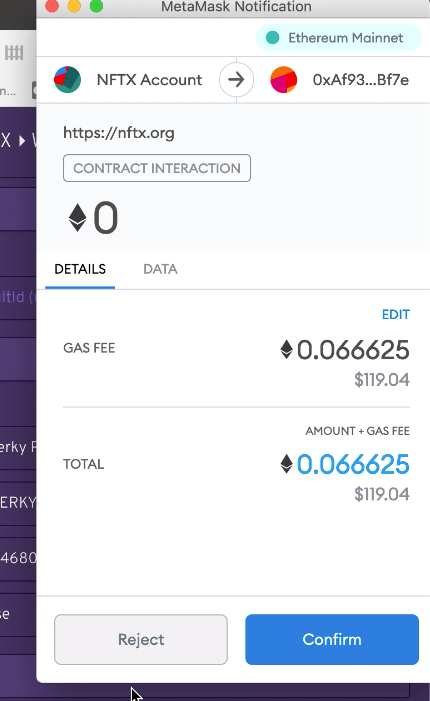
Go to the NFTX contract address 0xAf93fCce0548D3124A5fC3045adAf1ddE4e8Bf7e , go to Contracts -> Write as Proxy, and then choose Mint.
You want to include
payableAmount— put a0vaultID— the vault you want to mint into (likely the one you just create)nftids— you need to put these in[48]square brackets. You can mint more than one, but separate them with commas and no spaces i.e.[48,53,89]. This number is also listed on the OpenSea Chainlink info... image further back up ^d2Amount— put0into this field
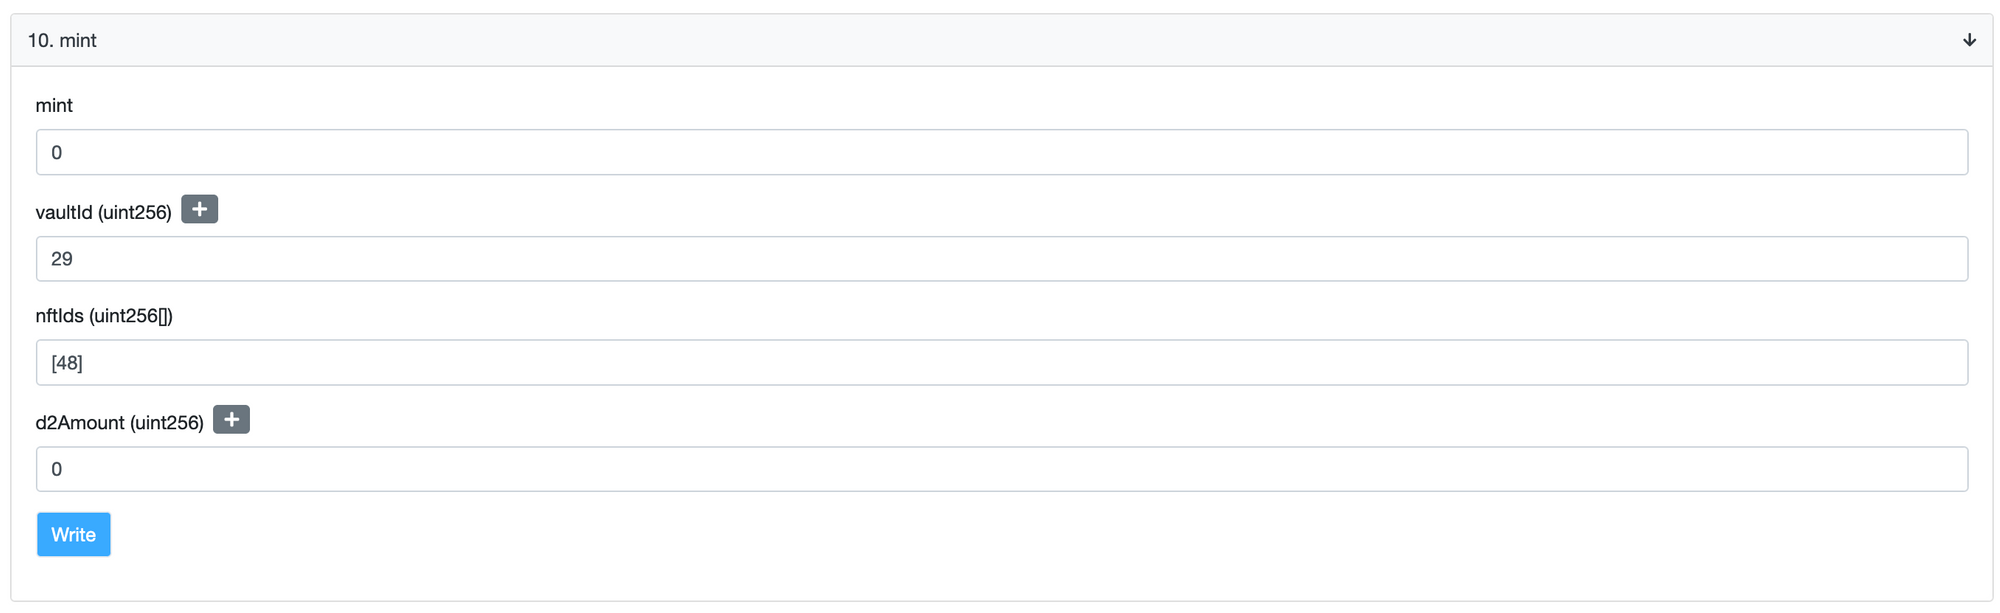
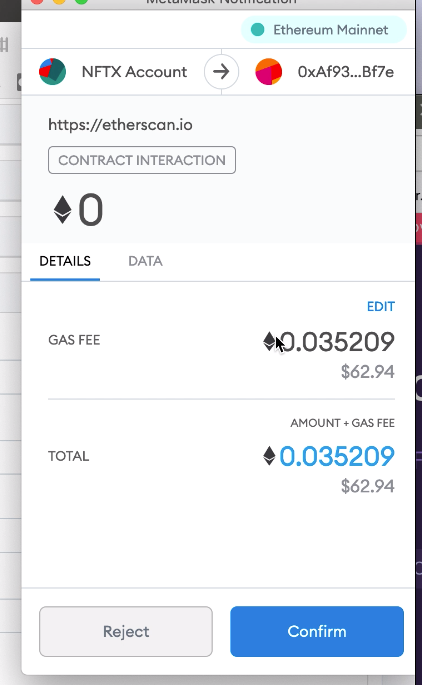
Once you're happy you can click Write and it will ask you to confirm Gas with your MetaMask
Once completed you can verify that the NFT has gone into the fund two ways.
First one is to check the OpenSea listing in a few minutes (takes a while to refresh on there) and you should see a transfer of ownership between you and NFTX

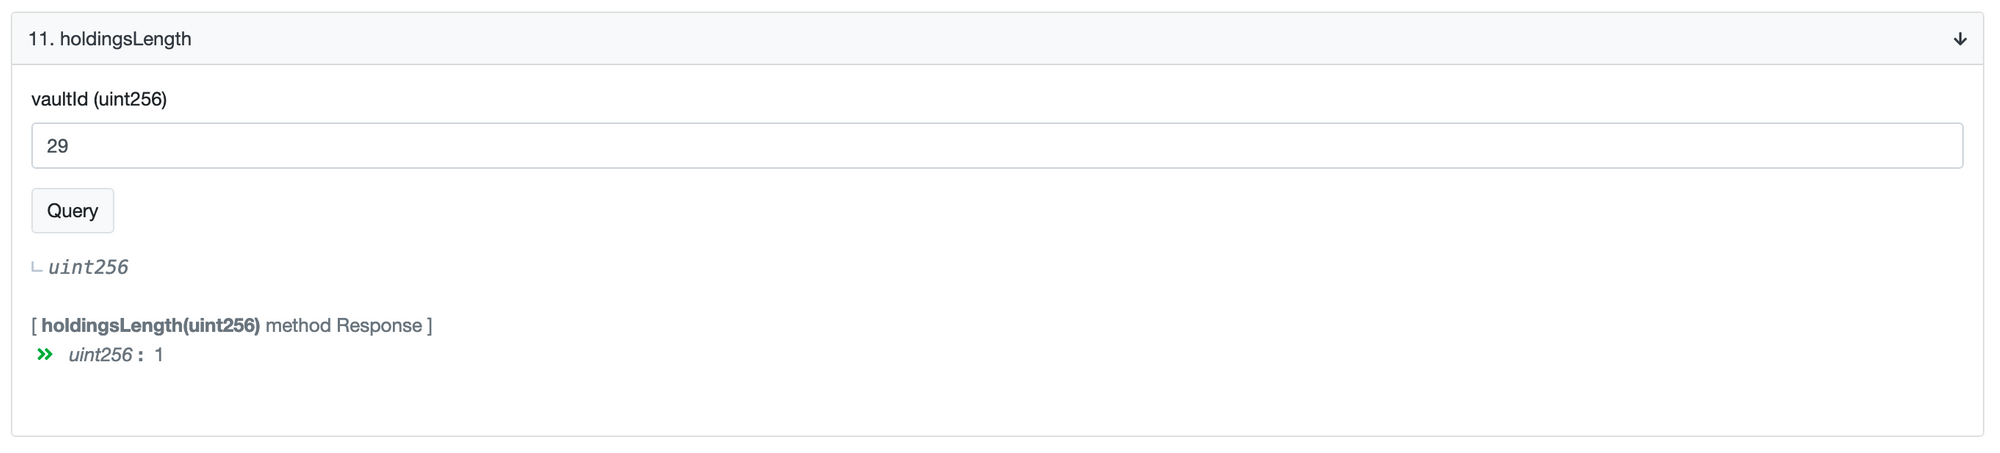
Second is to head to the XStore contract on Etherscan and run the Read Contract holdingsLength which should return the number of NFT's in your new fund.
Wrapping up
That was a fairly hefty tutorial, I know! Thanks for following it all the way along and I hope you're now a proud parent of an NFT Index Fund.
We weren't able to cover every eventuality in this tutorial, and while some of the stages seem like it's a few too many steps don't worry, we've got a genius team working on a new front end that will abstract a lot of this process away to make it easier.
Some things that weren't covered but are possible include
- Adding Allow Deny lists for Funds. This is great if you want to create a fund like Punk Zombie and only allow certain NFTs (the ones with Zobine traits) from the same collection (Cryptopunks) to be minted.
- Allowing Allow ranges — This is great for funds like Art Blocks which are all on the same NFT Contract, but each project has it's own distinctive range for their NFTs (based on the id of the project).
If you have any suggestions or comments please drop by discord for a chat.